")

Countertop chip repair may seem like a small detail, but ignoring it can lead to disproportionate woes. A chip can spiderweb into a crack, escalating a simple repair to a costly replacement. It’s not just a blemish on your otherwise flawless countertop; it’s a ticking time bomb for your wallet. Whether it’s quartz or granite, any damage disrupts the seamless elegance of your surface and jeopardizes the integrity of the counter.
Countertops aren’t just workspaces; they’re showpieces of your home—so when a chip occurs, swift action is essential. Arm yourself with an epoxy or acrylic repair kit and conquer those chips before they stain your home’s aesthetic.
Let’s dive into easy DIY techniques to turn your counter’s imperfections into a mere memory—your flawless finish awaits!
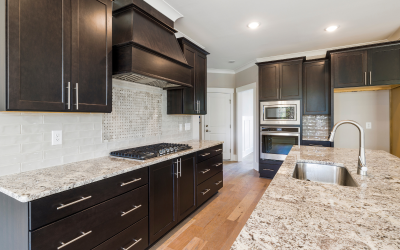
The Different Countertop Materials: Quartz, Laminate, And Granite
Each countertop material has its own superhero capabilities but is also prone to its unique kryptonite—in the form of chips.
Quartz Countertops:
- Non-porous; resists stains like a champ.
- Tough but can chip; a clear acrylic resin repair draws no attention to the repair.
Laminate Countertops:
- Budget-friendly; wears a shield against spills.
- When chipped, an adhesive repair kit with a color match makes restoration discreet.
Granite Countertops:
- Naturally strong, a fortress against heat and scratches.
- Chips can be a villain; a granite-specific epoxy kit fills in gaps, just sand to a smooth finish.
Handling countertop chip repair? Act fast. Whether quartz, laminate, or granite, use the right repair kit and save your counter from the domino effect of damage.
Identifying The Damage: Countertop Chips and More
Acting as the heartbeat of your kitchen, countertops, whether quartz, granite, or laminate, face everyday wear and tear. But how do you differentiate ordinary wear from a chipped countertop demanding immediate attention? And more importantly, how do you differentiate a chip from other damages?
- Countertop Chips: An indentation or pit caused by an impact, making quartz countertop chip repair or granite repair a priority.
- Scratches: Surface scuffs often appearing white, treatable with countertop polish and sandpaper.
- Gouges or Nicks: Deeper than chips, requiring more complex resin or epoxy treatment.

Countertop chip repair kickstarts when you identify chips correctly. Every chip, every nick, risks becoming a larger, more costly problem. So, grab your chip repair kit, roll up your sleeves, and give your countertop the attention it needs. Because fixing that small chip today means you’ll never pay for expensive, extensive repairs tomorrow.
Choosing The Right Repair Kit For Countertop Chip Repair
Don’t let a chipped countertop dim the shine of your kitchen. Selecting the ideal repair kit is crucial for a seamless fix. When scouting for that perfect kit, consider the material of your counter, the size of the chip, and the color match needed.
- Quartz and Granite Countertops:
- These stone powerhouses demand a repair kit with high-quality epoxy or resin. The kit should ideally include a hardener, pigmented adhesive to match the elaborate patterns of natural stone, and a polishing method to blend the repair seamlessly.
- An acrylic repair kit filled with clear resin for quartz countertops helps maintain the uniform look.
- Laminate Countertops:
- A laminate repair kit should come with color-matched putty or paint to fill the chip and hide the flaw effortlessly.
For each countertop material:
- The resin or adhesive must be stain-resistant to endure daily kitchen activities.
- Your repair kit must provide easy-to-sand solutions to ensure a smooth, undetectable repair.
- Ensure the kit includes detailed instructions—because even a great kit needs an excellent technique for the best results.
Equip yourself with the right repair kit, and you’ll turn countertop catastrophes into invisible history.
Step-By-Step Guide To Repair A Chip On Quartz Countertop
Treating a chip in your quartz countertop can be a swift victory with the right moves. Here’s a foolproof plan:
Preparation:
- Ensure your workspace is clean. Use soap and water to cleanse the countertop surface around the chipped area.
- Ready your quartz repair kit. These typically involve pigmented epoxy or acrylic resin, a hardener, and a polishing tool.
Application:
- Combine the epoxy resin with the hardener; color match as needed. Your countertop’s color palette waits for no one.
- Fill the chip. Use a spatula or a putty knife to apply the mixture carefully, ensuring you overfill slightly to account for shrinkage as it dries and cures.
- Allow it to dry. Patience, a virtue here, ensures no additional chips to fix later.
Finishing Touches:
- Once cured, grab the sandpaper. Level the filled area with the surface of your quartz countertop.
- Polish to perfection. A quick buff brings back that natural stone’s luster, making your countertop chip repair invisible.
And, just like that, you’ve mastered the easy way to fix a chipped quartz countertop. Your counters are back in action—durable, beautiful, and smooth to the touch.
Effective Ways To Repair A Chip On Laminate Countertop with A Laminate Repair Kit
Reviving your chipped laminate countertop is a weekend task set for success with these simple steps:
Chip Zone Prep:
- Start with a clean slate. Wipe the surface with a gentle cleaner to remove grime and debris.
- Sand the damaged area lightly to help the adhesive bond firmly.
Laminate Repair Mastery:
- Select your laminate repair kit. It should contain a color-matched adhesive to ensure the repair blends seamlessly.
- Mix the kit’s contents according to the instructions; precision here is key to counter stain worries later.
- Fill the chip. Apply the color-matched acrylic or epoxy resin with a putty knife, pressing down firmly.
- After filling, allow your repair to settle in. A correct dry is crucial for a long-lasting fix.
Post-Repair Care:
- Once dry, sand again—this time, for smooth integration with your counter’s surface.
- Avoid placing hot items on the repaired patch to prevent future damage.
With these steps, you’ll repair and sustain your laminate countertops, keeping them looking stellar round the clock.
How To Use A Granite Repair Kit For Chipped Granite Countertop
Repair the regal glow of your granite countertop with concise steps and the right granite repair kit:
Grand Granite Tips:
- Always begin with clean, dry granite countertops. Prep the chipped area with mild soap and water.
- Drill small holes if it’s a deep chip for the epoxy to bond better.

Rock Solid Repair:
- Choose a high-quality granite repair kit. It should include pigmented epoxy to match your countertop’s natural stone color.
- Mix the epoxy and hardener as per instructions. Fill the chip using a spatula or knife, slightly overfilling to prepare for shrinkage upon drying and curing.
- Wait as the repair dries. Remember, patience equals a seamless blend.
Post-Repair Care:
- Once dry, carefully sand down the bumped-up epoxy to the countertop level. This ensures the repair blends with your countertop surface.
- Lastly, polish the repaired area to regain your granite’s gloss.
Perform these countertop chip repair steps carefully, and your kitchen countertop will show no signs of being once chipped. Let your granite shine, not shatter!
Maintaining Your Repaired Countertops
Keep your countertops — quartz, granite, or laminate — looking as good as new with these key maintenance and prevention steps. Remember, a stitch in time saves nine, especially in countertop care.
Countertop Care Is Key:
- Regular cleaning is your first line of defense. Wipe your countertop daily with a soft cloth and a mild cleaner to avoid stain buildup.
- Avoid harsh chemicals that can damage the sealant on your granite or natural stone countertops. Opt for soap and water or a stone-safe cleaner.
Chip Prevention Tactics:
- Use cutting boards, not directly on your countertops, even if they’re quartz or granite, known for their durability.
- Mind the weight. Don’t place heavy pots or appliances on the edges, especially where chips are most common.
- Always follow the manufacturer’s guidance for repair kits. Whether epoxy, acrylic, or resin-based, using the right adhesive is crucial for both fixing chips and maintaining the integrity of the repair.
Wrapping Up:
- From repairing a chip on quartz countertops with a quartz repair kit to handling a gouge in your granite with a granite repair kit, we’ve covered the essentials for bringing your counters back to life.
- Acrylic resin, epoxy, and sanding are your go-tos for making those dreaded chips and nicks disappear. But remember, the real magic lies in preventing them in the first place.
Empower yourself with these maintenance and prevention tips, and enjoy pristine countertops that withstand the test of time and use.
0 Comments