")

Smooth and tidy walls can significantly enhance the aesthetics of your home. But, sometimes, textured walls can be challenging, especially when it’s time for a fresh coat of paint. Textured walls are a popular choice in home design due to their ability to add depth and visual interest to a room while also adeptly hiding any wall imperfections.
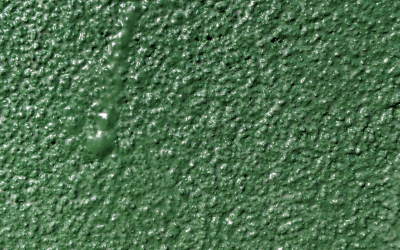
They are produced by applying a thick substance – typically plaster or drywall – onto the wall’s surface and manipulating it to create patterns such as knockdown, popcorn, orange peel, or slap brush.
Textured walls can add depth, warmth, and personality to a room. Even so, they often present a challenge when it comes time for maintenance or priming for a new paint job. To properly care for your textured walls and get them ready for a new look, you’ll have to learn a few essentials about sanding. Below are some must-know tips for sanding textured walls.
Why Sand Your Textured Walls?
Sanding textured walls is an important step in the process of home renovation or freshening up your interior with a new paint job. There are several key reasons why you should sand your textured walls:
- Improved Paint Adhesion: Sanding smoothens the wall surface, enabling new paint to adhere better. This ensures a vibrant, even, and long-lasting paint job.
- Aesthetics: Smoother walls provide a clean, refined look that can significantly enhance the aesthetics of your living space.
- Cost-effectiveness: Well-sanded walls reduce the amount of paint needed for a sufficiently even and thorough color application. Ultimately, this makes your painting projects more cost-effective.
- Eliminate Imperfections: Sanding also helps to eliminate small wall imperfections and rough patches, facilitating a polished and impeccable finish.
Essential Tools You Need
Before beginning your wall sanding project, gather all necessary tools, such as:
- Sandpaper: Various grit sizes are necessary for different process stages, from rough sanding to smooth finish. Start with a larger grit size (60-80) and gradually move to smaller ones (100-150 and then 180-220).
- Sander: A manual sander might suffice for a small area, but consider an electric sander for larger projects to save time and energy.
- Safety Glasses: Essential for protecting your eyes from dust and debris during sanding.
- Dust Mask: A mask can prevent inhalation of dust and small particles, protecting your respiratory system.
- Gloves: Protect your hands from scratches or scrapes during sanding.
- Ladder: This will likely be necessary for reaching higher areas on the walls.
Preparing Textured Walls For Sanding
Preparing your textured walls for sanding requires diligence, the right tools, and a keen eye for detail. To start, one should hydrate their wall texture thoroughly by cleaning it, removing any dirt that may lead to an uneven skim coat. A clean wall is the first step towards achieving a smooth, satisfying result.
Examine meticulously for any drywall damage, peeling, or imperfections. Correcting these irregularities can make a world of difference when it’s time to sand the wall. Ensure you have the necessary tools. A quality sander transforms your textured wall into a smooth surface.
The goal is to remove the distractions caused by unnecessary textures and skim your walls to perfection. Whether your textured wall is on your ceiling or walls, proper preparation is the secret to a smooth finish.
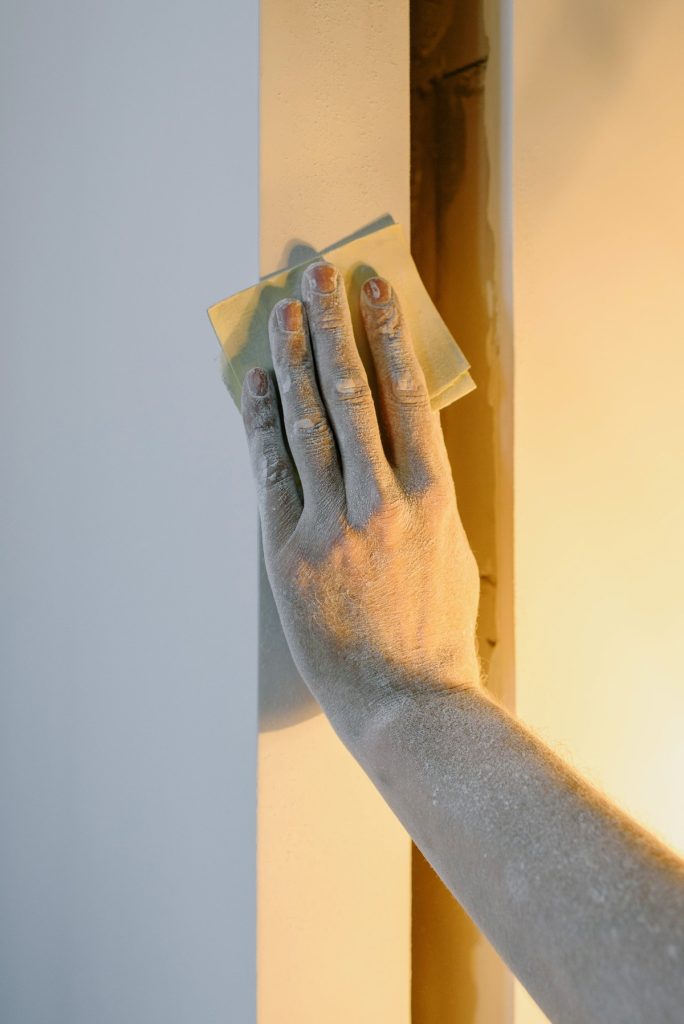
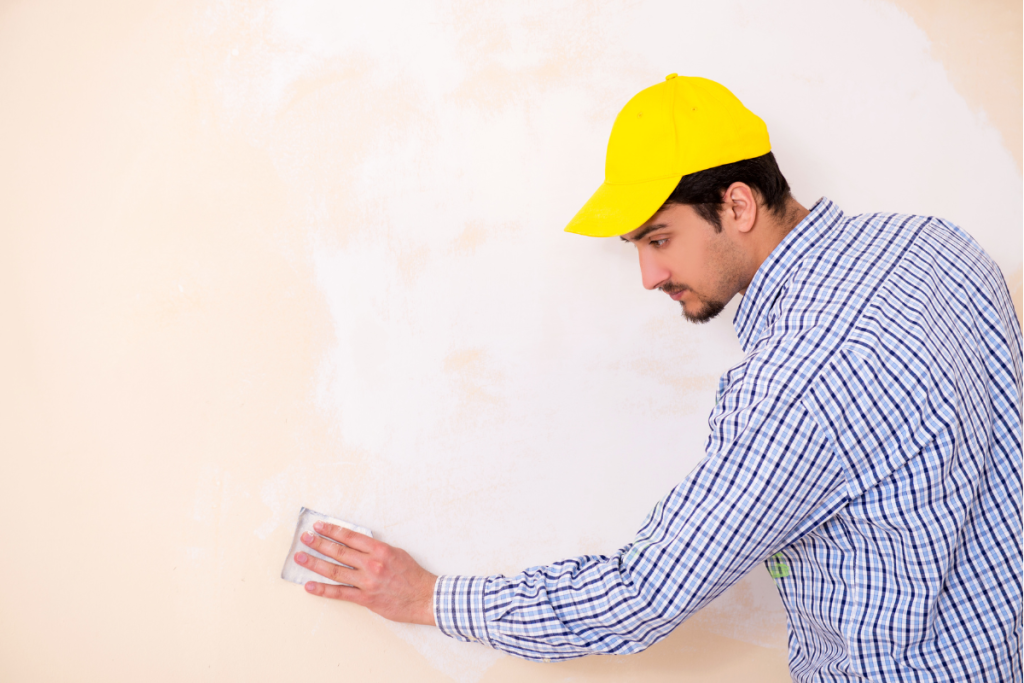
How To Sand Your Textured Wall
Sanding your textured wall is a task you can handle with confidence with the right steps. Here’s a step-by-step guide to sanding textured walls perfectly:
- Prepping the Area: Cover your furniture and flooring with drop cloths or plastic sheets to prevent dust from spreading. If possible, try to empty the room.
- Select The Right Sander And Sandpaper: Starting with coarse-grit sandpaper (60-80 grit) will smoothen significant bumps. Gradually move to medium (100-150 grit) and, finally, fine-grit sandpaper (180-220 grit) for a flawless finish. Manual sanding is ideal for small areas, but consider electric sanders for larger areas or entire rooms to save time and effort.
- Apply The Right Pressure: Applying the correct pressure is vital. Too much pressure can lead to uneven surfaces. Let the sandpaper do the work. The key is to keep it moving, preventing it from concentrating on one spot.
- Sand In Various Directions: Sanding in various directions – up and down, side to side, diagonally – helps achieve a smooth and even result.
- Clean Up: Clean the walls with a slightly damp cloth after sanding. Ensure the walls are completely dry before applying primer or paint.
With deep textures, you may need additional skim coats and even more sanding – however, through the process, the smooth finish you’ll achieve on your walls and ceilings will be worth every effort.
The Role Of Skim Coat In Wall Texture Preparation
A skim coat is a thin material layer (usually a joint compound) applied to a textured wall, helping create an even, smooth surface. This layer is pivotal to the sanding process, significantly enhancing the final outcome of your walls and ceilings.
Before sanding textured walls, applying a skim coat is a must. This important step ensures a level foundation, making it much easier to sand your walls without any imperfections. Skim coats hide inconsistencies in wall texture by bridging the gaps between rough patches and uneven areas.

The application process for skim coats on textured walls is simple. Using a trowel or a drywall knife, spread a thin layer of joint compound evenly over the entire surface of the wall. Once the compound dries, sand the wall to achieve the desired smoothness. Adopt the power of skim coats, and watch your walls transform from rough, textured surfaces to sleek, polished masterpieces.
Trowel Techniques For Smooth Wall Finishes
If textured walls in your home are waning on you, we’ve got the perfect solution. Tackle that grit with a trowel and a can-do attitude, and you can create the smooth wall finish you’ve been dreaming of. Using a trowel for skim coating your walls can transform a heavily textured finish into a smooth one, offering a streamlined look and feel.
Here’s how: Apply a thin layer of joint compound onto the wall and smooth over the existing texture using your trowel. It may take practice to avoid damage to your walls and achieve a perfectly smooth surface, but you’ll find it worth the effort. This texturing transformation not only immensely improves aesthetics but also facilitates better adhesion for a subsequent paint job.
Tips For Sanding Textured Walls: Day To Day Home Care Tips
Sanding textured walls can be challenging but essential when redecorating or updating a home’s interior. Here are some helpful day-to-day home care tips for effectively sanding textured walls:
- Select The Right Tools: For a successful sanding project, choose the appropriate sanding tools, such as a drywall pole sander, an orbital sander, or a manual hand sander. Use sandpaper with different grits, starting with a coarser 80-grit and transitioning to a finer 120- or 150-grit for a smoother finish.
- Protect Your Belongings And Yourself: Since sanding generates a lot of dust, remove or cover furniture with plastic sheeting and seal off the room’s entrance. Use a dust mask, eye protection, and work gloves for personal safety.
- Adopt Proper Sanding Technique: Sand the wall using a circular motion, gradually moving around the room from top to bottom. Apply even pressure, and avoid pressing too hard to prevent gouges or uneven patches.
- Monitor Progress: Assess your work periodically to ensure consistent results. Use a light positioned at an angle to highlight inconsistencies and make necessary corrections.
- Repair Damaged Areas: Fill imperfections like cracks or holes using a drywall compound and a putty knife. Once dry, gently sand the repaired spots for a seamless finish.
- Clean Up And Prime: After sanding, clean the room with a shop vacuum and wipe the walls with a damp cloth. Apply a drywall primer to prepare the wall for paint or wallpaper.
How To Maintain Your Smooth Walls After Sanding
For walls that have been sanded from heavy texture to sleek smooth, regular care ensures they remain flawless. Day-to-day maintenance is straightforward – a soft cloth wipe-down is enough to keep dust and grime away. However, be vigilant about moisture accumulation, as it can lead to an uneven wall texture.
Occasionally, run your hand over your walls to feel for any emerging imperfections. Should a problem surface, like peeling paint or rough patches, skim the area and sand the wall lightly to restore smoothness.
FAQs About Removing Texture From Your Walls
Unleashing new life from your textured walls comes with questions
- Can I Remove Texture From My Walls Myself? Absolutely. With the right materials, such as a trowel, sandpaper, and a bit of patience, you can transform your heavily textured walls into a smooth finish masterpiece.
- What If I Damage My Wall While Sanding? Drywall compound is your ultimate redeemer. Apply a layer onto the wall, skim coat, and lightly sand to achieve a smooth surface.
- How Do I Handle Stubborn Existing Textures? An orbital sander may be your savior but remember to don your dust mask.
Sanding textured walls requires patience and careful attention to detail. Follow these must-know tips to achieve a smooth finish, and your textured walls will be transformed quickly. With the proper tools, technique, and preparation, this day-to-day home care task is manageable and will leave you with a beautifully refreshed living space.
0 Comments